Fairies are captivating creatures of fantasy, with a charm that has intrigued us through countless stories.
Typically, they’re drawn as small, winged beings that look a bit like tiny people, and they often have special touches like pointed ears or different hands.
Fairies zip around in magical forests and sometimes lend a hand in fairy tales, like helping Cinderella. Their air of mystery is what draws us to them.
Drawing a fairy is easier than it seems. You might think they require lots of intricate details, but the basic shape and features of a fairy are quite straightforward.
If you want to learn how to draw a fairy, we’ve broken down the process into six simple steps.
Perfect for anyone who wants to give drawing a try or just have fun sketching a fairy, these steps are easy to follow with clear illustrations to guide you.
Step 1: Gather your drawing tools
Make sure you have a sharp pencil or a tablet stylus at your disposal, as they’re the only tools you will need for drawing your fairy.
If you’re using a pencil, make sure it’s sharp enough to produce clear, precise lines. A blunt pencil can lead to fuzzy outlines and smudged details, which would take away from the beauty of your fairy.
Similarly, if you’re using a tablet stylus, ensure it’s properly calibrated for accurate strokes.
Step 2: Draw the head, arms, and upper body
With your tools ready, dive into the first step of how to draw a fairy – sketching out the head, arms, and upper body.
Begin by drawing an oval for the head, slightly tilted as fairies are often depicted in motion.
Next, lightly sketch two lines down from the head to create the neck. From the neck, draw two more lines going outward for the arms.
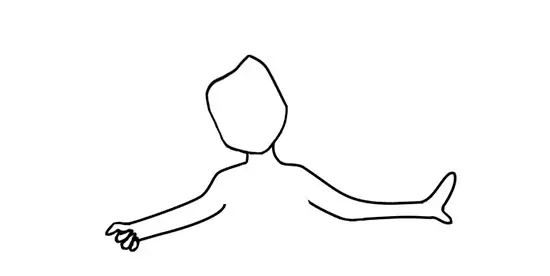
Remember, fairies are delicate creatures, so keep these lines thin and elegant.
For the upper body, imagine a petite corset-style top. Use gentle heart-shaped curves to draw this. Ensure both arms are symmetrical and in a natural, relaxed position.
Take your time on this step, as it forms the foundation of your fairy’s figure.
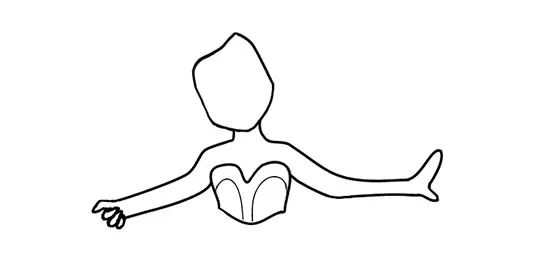
Step 3: Design the fairy’s skirt and hair
For the skirt, draw outward curves from the waist to create a flowing effect. Connect the curves at the bottom with a frilly hem for added enchantment. Feel free to customize your skirt with patterns or designs of your choice.
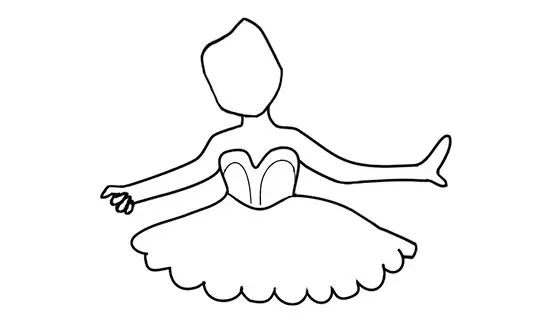
Moving on to the hair, start with a vertical hairline above the face outline. Then, let your pencil dance across the paper, creating a wavy line that captures the fairy’s playful spirit. This will form the outline of your fairy’s hair.
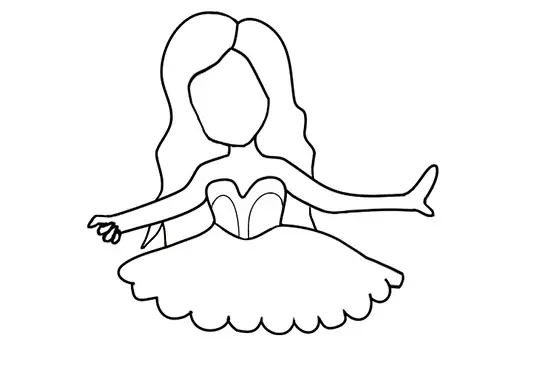
There’s no right or wrong here. Your fairy’s hair could be curly, straight, short, or long. The choice is yours.
Step 4: Create legs and wings
For the legs, start by sketching a line at a 90-degree angle from the skirt’s bottom for the front leg. Add a slight outward curve to give it a whimsical look and don’t forget to include a tiny foot.
The back leg should be at a more vertical angle, slightly raised to the right. This positioning will give your fairy the appearance of flying.
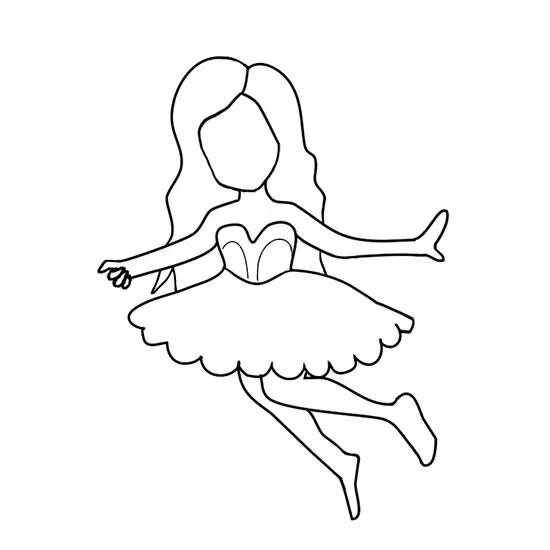
Next, let’s work on the wings. Draw them large enough to be proportionate to the fairy’s body. Think of butterfly wings – they’re not straight lines, but broad, curved shapes. Don’t worry about details yet, just get the overall shape down.
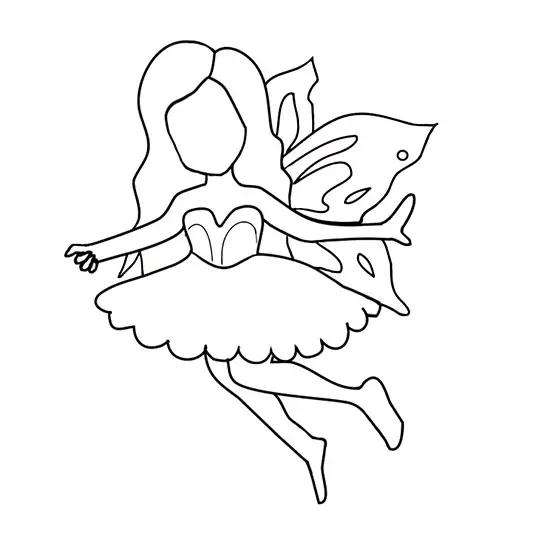
This is your fairy taking shape!
Step 5: Add details to the fairy’s features
With the basic structure in place, it’s time to dive into the finer details of your fairy’s features.
But first, turn your attention to her hands. In one, draw a magical wand with a five-pointed star at the end, symbolizing her magical abilities.
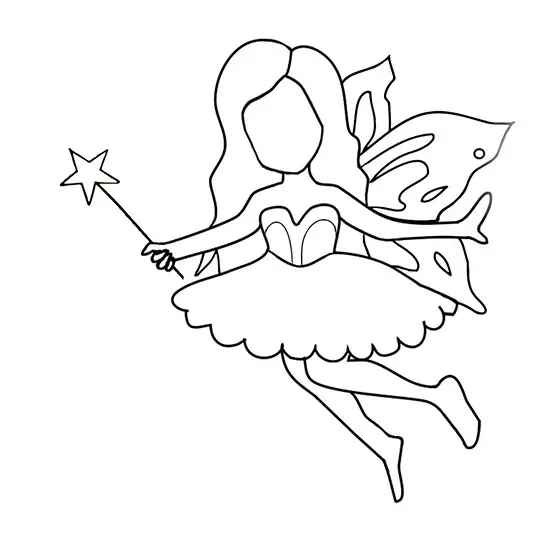
Now, start shaping the face, using curved lines to form her delicate eyebrows and a beaming smile to give her a joyful expression. Don’t forget to add large, expressive eyelashes.
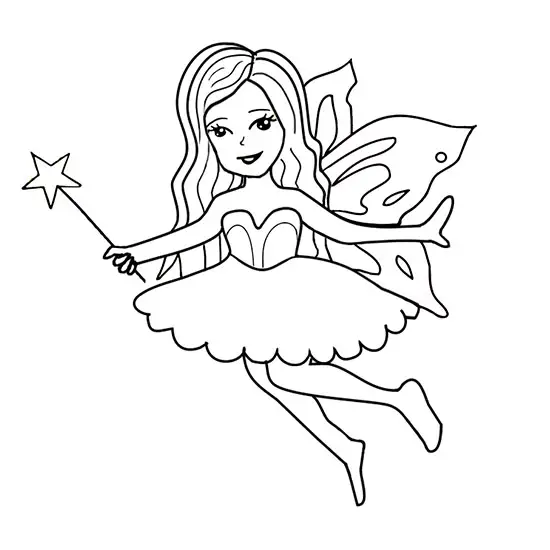
Next, Add details to the hair. Whether you prefer straight, wavy, or curly hair, make sure it frames her face perfectly.
Step 6: Bring your fairy to life with color and shading
Start by choosing your color palette. Traditional fairy colors are often bright and cheerful, but don’t be afraid to experiment with different hues.
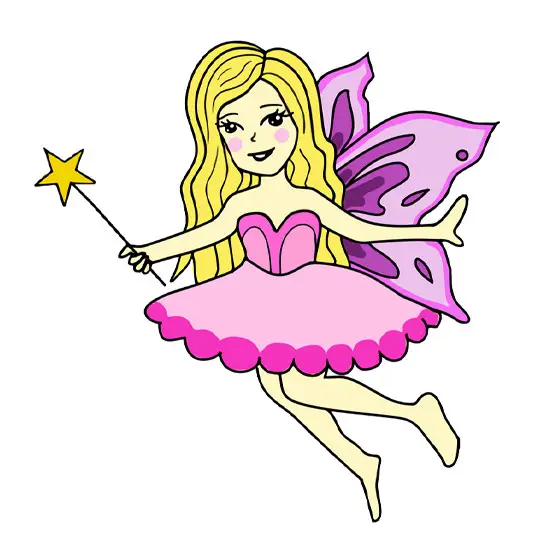
Use colored pencils or markers to fill in your fairy’s outfit, hair, and wings. Don’t forget to color her wand, add a rosy hue to her cheeks, and add a sprinkle of fairy dust for the magical touch if you can.
Final Words
And there you have it! You’ve successfully brought a magical fairy to life, right from your imagination onto the canvas.
Remember, you can always think of design variations. Mix and match different elements to create a unique look.
Perhaps your fairy has butterfly-like wings, or maybe she’s sporting a flowing mermaid tail instead of legs. It’s your drawing, you make the rules.