Pirates are famous for making people walk the plank, having big sea battles, and hiding treasure. Want to make your own pirate treasure?
Here’s a simple treasure chest drawing guide. But remember, you’ll have to pretend the gold coins are there!
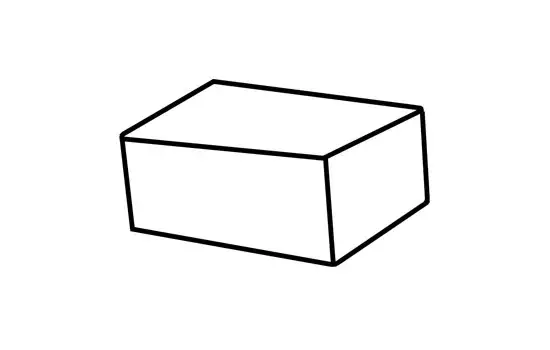
Step 1: Draw the front view of your treasure chest drawing
Let’s start by drawing the front of the treasure chest, which consists of two parallel lines about two inches apart, connected at both ends. This will be the base of your chest.

Next, you’ll want to create the sides of the chest. This is achieved by drawing two more lines at a right angle from each end of your base. These lines should be slightly shorter than your baselines.
Step 2: Craft the chest interior
Start by drawing an angled line from the top-right corner to the top-left corner of your rectangle. This creates the illusion of depth, making your chest look 3D.
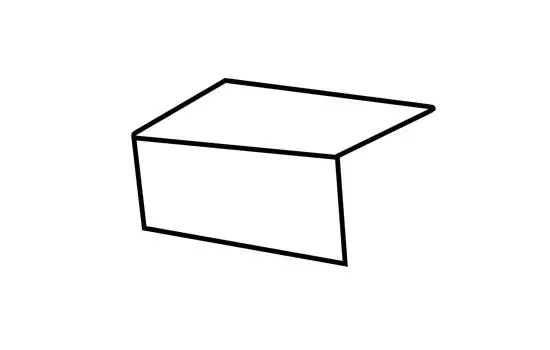
Step 3: Sketch the chest base
Start by locating the bottom right-hand corner of the lower rectangle you’ve drawn. From this point, draw a straight line that extends directly beneath the top right-hand corner of the upper rectangle.
This will form one side of your chest base. Repeat this process on the other side. Your chest base should now resemble a trapezoid.
Step 4: Illustrate the Lid
First, draw a large ‘D’ shape from the top-right corner. This will give the lid a curved, 3D appearance. Make sure the straight line of the ‘D’ starts at the same height as the rectangle’s left side.

Next, it’s time for details. Draw two parallel lines within the ‘D’ shape, following its curve. These lines represent the wooden planks of the lid.

Lastly, draw a small line at a slight angle on the top-left corner of the lid. Connect it to the ‘D’ shape’s straight line. This completes your lid!
Step 5: Craft the Hook
Sketch a large, bubble-letter ‘C’ along the chest’s side. Cross it with a second ‘C’, tipped on its side, to shape a pirate hook.
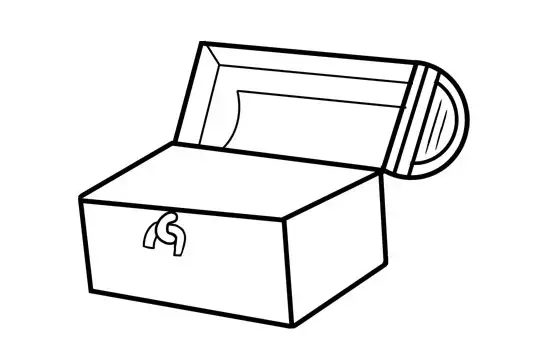
Step 6: Draw the padlock
Just below the hook, sketch a sideways ‘D’ with the curved part facing down. In the middle of this ‘D’, etch in a ‘J’ shape that reaches halfway along the curved edge. Then, within this space, craft a small keyhole and fill it with shading for depth.
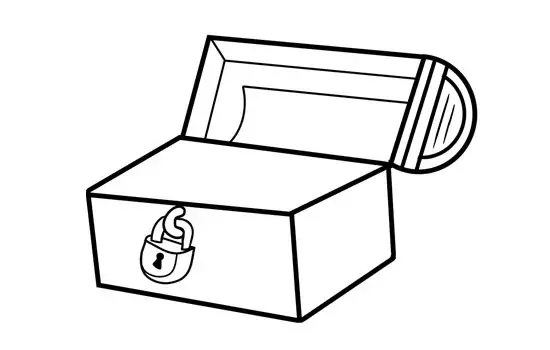
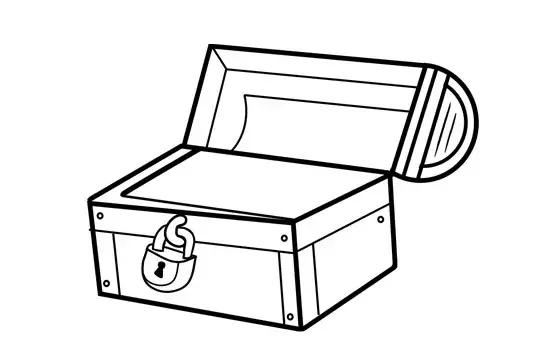
Step 7: Embellish the chest
Place a small dot in the inner bottom-left corner of the chest’s interior. Draw lines from this dot to the bottom-right corner and then upwards to the top-right inner corner.
Sketch horizontal lines along the chest’s outer edges to mimic wooden planks. For a touch of realism, dot each corner with a sizable point to represent sturdy nails.
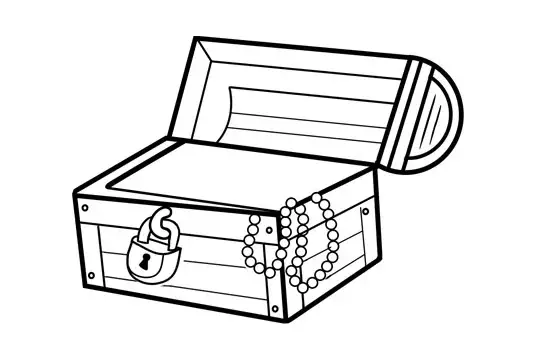
Step 8: Sketch the pearls
Sketch a string of small circles to resemble a pearl necklace dangling off the chest’s right side. Make a smaller string next to it. Then draw parallel lines down the sides of the chest for detail.
Step 9: Draw the treasure
Draw lots of small ovals and circles to look like coins, and put in some curved lines for a bumpy texture. To make jewels, just put a triangle on top of a square and draw lines from the points to the bottom.
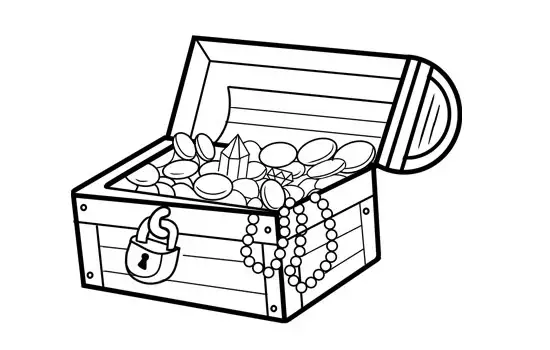
Step 10: Add color
Use light and dark shades to make things look more 3D. You can draw patterns on the coins to make them interesting, and shade the jewels so they seem shiny.
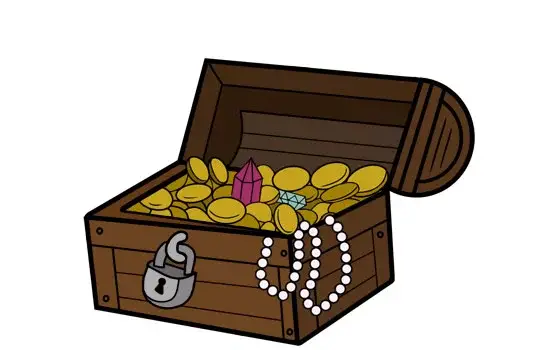
And there you have it! Feel free to personalize your treasure chest drawing now.
You might color it in a dark shade and decorate it with a classic pirate symbol, adorn it with sparkling jewels and makeshift wooden legs.
You can even add a touch of whimsy by drawing a parrot sitting on top!