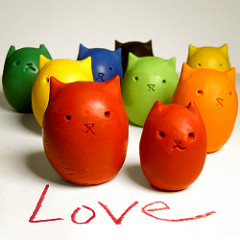
Introducing our newest venture- Kitty Egg Crayons!
The idea of making molded items was sparked when we were at the craft store looking for supplies. 1 box of clay, 1 mold kit, and a bag full of crayons later, voila!
We were originally going to do them just for ourselves as “rock crayons.” But as we started the process the idea of egg shaped crayons, and then potentially selling these things in our etsy shop came up- hence Kitty Eggs.
They take some time to make and are a bit trickier to mold than regular rock crayons. Also the time it takes to hand carve their faces can be tedious, though Ben admits to enjoying this step the most.
We’re thinking of Kitty Egg Candles as our next project since we have a block of beeswax sitting around, waiting to be used…
Until then, buy handmade, and enjoy the kitty eggs while you can!
* * * Tutorial * * *
Here is a brief tutorial on the general making of molded crayons:
Cost: $-$$
Time: 15 minutes
Materials:
* crayons
* heating source (microwave, oven, pots of pans and water…)
* mold (anything from store bought to homemade tin foil molds will do)
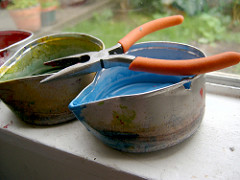
* baking glove or some kind of protection from the hot wax (we used a pair of pliers)
1. Make time. Rainy days are perfect for this activity- by yourself, with a lover, or as a family activity.

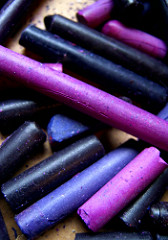
2. Find crayons. We recommend nontoxic crayons for family use. Standard Crayola brand crayons are easy to find (hello local grocery store), although we’ve found that other brands can work just as well.
Specialty crayons may not work as well, i.e. glow-in-the-dark crayons, or glitter crayons. The cheapest crayons are the ends and broken off bits you already have at home.
3. Peel paper off crayons, break in half if necessary, and melt. You can melt them in a variety of ways. Heat lamp, oven, etc. We used the double boiler method- empty crayons in a heatable container and boil the container (with the crayons in them) inside another pan of water.
We encourage using recycled cans. We molded ours to have a pouring spout and used an old meatloaf pan to boil it in. If you want to reuse the same can for making multiple crayon molds, we recommend using a pot that you don’t mind tossing at the end. It can get a little messy. Depending on the size of your mold, melt between 5-15 crayons. This part takes some experimenting.
4. After crayons are melted, pour the heated wax into the mold. This is where the baking mitts come in. Always use caution and common sense when handling hot objects. Don’t have a mold? Don’t worry, you can make your own- be creative! Tin foil or a cupcake container can work just as well as a store bought mold.
5. Let wax cool. The wax will instantly start to cool and shrink. If necessary, refill the mold and let cool again. This would be a good time to experiment with layers of colors. If you’re impatient, you can pop the mold into the fridge or freezer for a few minutes.
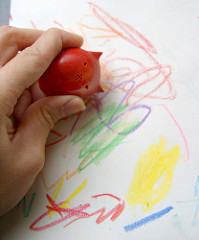
6. When cooled, release crayon from mold and start coloring. That’s all!

